
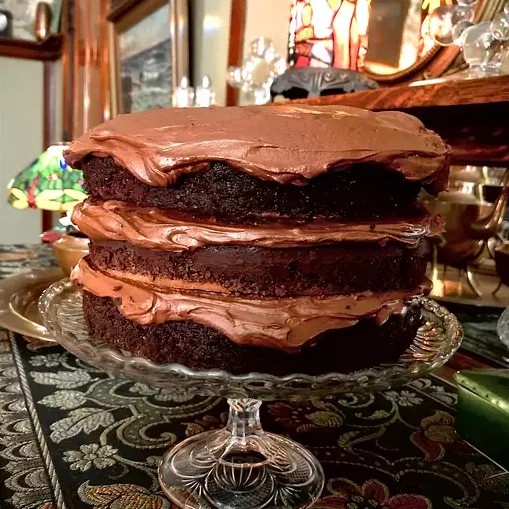
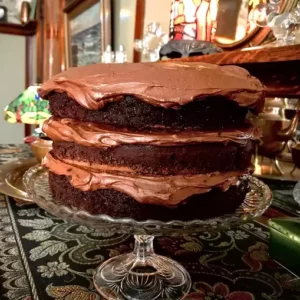
Introduction Chocolate Cake
Chocolate cake is a timeless dessert loved by many. But when Halloween is just around the corner, why not elevate this classic treat with a spooky twist? In this guide, we’ll walk you through a delightful chocolate cake recipe from scratch, tailor-made for an easy Halloween celebration. So, roll up your sleeves and let’s get baking!
The History of Chocolate Cake
The history of chocolate cake is both delicious and intriguing. Here’s a brief overview of its evolution in the United States:
Early Beginnings Chocolate Cake:
Until the 1830s or 40s in America, chocolate was primarily consumed as a beverage. The term “chocolate cake” originally referred to a white or yellow cake meant to be eaten alongside a chocolate drink. Even though chocolate began to be incorporated into sauces and frostings, the primary conception of chocolate remained as a liquid treat until the early 20th century.
First Printed Recipes for Chocolate Cake:
One of the earliest printed recipes for chocolate cake in America can be found in the cookbook “The Hostess of To-Day” by Linda Larned (1899). These early chocolate cakes were lighter in color than today’s versions, using less sugar and cocoa. They also had more flour, making them fluffier, similar to what we’d now call a breakfast bread.
Shift in Tastes:
By 1912, chocolate cakes were becoming more common, but drinking chocolate and chocolate for sauces and frostings were still the predominant uses for cocoa. Advertisements from this period, like one from Lowney’s Cook Book, began to promote cocoa powder’s versatility in drinking, baking, and decorating.
Modern Chocolate Cakes:
By the 1940s, baking with chocolate had become a staple in American households, largely due to the commercial success of companies like Hershey Chocolate Company. Chocolate cake recipes from this era began to call for larger quantities of cocoa and sugar, transitioning into the rich and decadent chocolate cakes we’re familiar with today.
Celebrating Chocolate Cake:
The Clements Library celebrated National Chocolate Cake Day by baking a chocolate cake from a 1916 recipe. This cake was described as light, fluffy, not overly sweet, and perfect with coffee or tea.
For those interested in diving deeper into the topic, “The True History of Chocolate” by Sophie D. Coe and Michael D. Coe (1996) is recommended.
Benefits of Baking Chocolate Cake from Scratch
Baking from scratch offers a range of benefits, both tangible and intangible. Here are some of the advantages:
Control Over Ingredients:
When you bake from scratch, you have complete control over the ingredients you use. This means you can opt for healthier alternatives, avoid allergens, and ensure that the ingredients are fresh and of high quality.
No Preservatives or Artificial Additives:
Many store-bought baked goods and mixes contain preservatives to extend shelf life and artificial flavors or colors. Baking from scratch allows you to avoid these additives, resulting in a more natural product.
Cost-Effective:
In the long run, buying basic baking ingredients in bulk can be more cost-effective than purchasing pre-made mixes or ready-made baked goods.
Freshness:
There’s nothing like the taste of a freshly baked treat straight out of the oven. Baking from scratch ensures that you’re enjoying your baked goods at their peak freshness.
Sense of Accomplishment:
Baking from scratch can be a rewarding experience. There’s a sense of pride and accomplishment in creating something delicious with your own two hands.
Customization:
When you bake from scratch, you can easily customize recipes to suit your taste. Whether it’s adding a touch more cinnamon, using a different type of nut, or experimenting with flavors, the possibilities are endless.
Therapeutic Benefits:
Many people find the act of baking to be therapeutic. The methodical steps, the kneading of dough, and the aromas that fill the kitchen can be a form of relaxation and stress relief.
Better Taste:
Many avid bakers argue that baked goods made from scratch simply taste better. Without the artificial flavors and preservatives, the true flavors of the ingredients shine through.
Knowledge and Skill Development:
Baking from scratch allows you to learn and understand the science behind baking. Over time, you’ll develop skills and knowledge that can make you a better baker.
Bonding Time:
Baking can be a wonderful activity to share with family and friends. It offers an opportunity for bonding, teaching children basic cooking skills, and creating lasting memories.
In conclusion, while baking from scratch might take a bit more time and effort compared to using pre-made mixes, the benefits in terms of taste, health, and personal satisfaction make it well worth the effort. Whether you’re a seasoned baker or just starting out, there’s always joy to be found in creating something from scratch.
Halloween and its Significance
Halloween, celebrated on October 31st, has ancient roots and has evolved over the centuries to become the holiday we know today. Here’s a brief overview of its significance and history:
- Origins: Halloween’s origins can be traced back to the ancient Celtic festival known as Samhain, which was held on November 1. The Celts believed that on this day, the souls of the dead returned to their homes. To ward off these spirits, people would dress in costumes and light bonfires.
- Evolution in America: In the United States, the early celebrations of Halloween were influenced by the traditions and beliefs of the various immigrant groups that settled in the country. Over time, the holiday became more about community and neighborly get-togethers than about ghosts and witchcraft.
- Modern Celebrations: Today, Halloween is known for its fun activities like trick-or-treating, costume parties, carving pumpkins, and watching horror movies. However, its origins and the significance of many of its customs can be traced back to ancient beliefs and practices.
- Christian Influence: The name “Halloween” is derived from “All Hallows’ Eve,” the evening before the Christian holiday of All Saints’ Day. Over time, many of the ancient customs of Samhain were incorporated into the Christian observance of All Hallows’ Eve.
- Symbolism: The symbols and customs of Halloween often have roots in ancient traditions. For example, the colors black and orange associated with Halloween have significance. For the Celts, black represented the “death” of summer, while orange symbolized the autumn harvest season.
Halloween is a blend of ancient customs, religious observances, and modern fun. It serves as a reminder of the changing seasons, the cycle of life and death, and the thin boundary between the living and the spirit world.
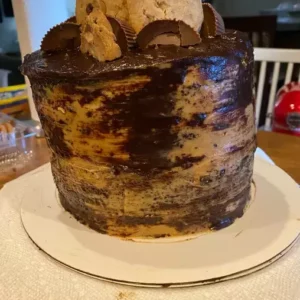
Decorating Your Chocolate Cake for Halloween
Decorating a chocolate cake for Halloween can be a fun and creative endeavor. Here are some spooky and delightful ideas to transform your chocolate cake into a Halloween masterpiece:
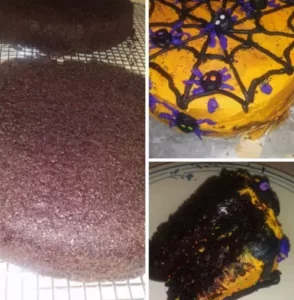
Spider Web Design
-
- Use white icing or melted white chocolate to create a spider web pattern on the top of the cake.
- Place a plastic or edible spider in the center or have several smaller spiders crawling around the web.
Graveyard Scene
-
- Crumble chocolate cookies or brownies to mimic dirt and spread them over the top of the cake.
- Insert cookie tombstones (you can use rectangular cookies and write “RIP” with icing).
- Add gummy worms to give it a “worms crawling out of the grave” effect.
Pumpkin Patch
-
- Use orange-colored fondant or marzipan to create mini pumpkins and place them on top of the cake.
- Use green icing to pipe vines connecting the pumpkins.
Haunted House Silhouette
-
- Cut out a haunted house silhouette from black fondant and place it on one side of the cake.
- Add yellow or orange icing behind the windows to mimic lights.
Witch’s Cauldron
-
- Use green or purple icing to create a bubbling cauldron effect on top of the cake.
- Add candy eyes, gummy worms, and other spooky candies to look like the witch’s brew.
Glowing Eyes
-
- Use glow-in-the-dark edible gel to create pairs of glowing eyes all around the sides of the cake. This will give the illusion of creatures lurking in the dark.
Bloody Drips
-
- Use red icing or raspberry sauce to create “blood” drips down the sides of the cake for a gruesome effect.
Mummy Wrap
-
- Use white fondant strips to wrap the cake, mimicking a mummy. Add two candy eyes peeking out from between the wraps.
Bat Flight
-
- Cut out bat shapes from black fondant and attach them to the sides and top of the cake. You can also use bat-shaped sprinkles or candies.
Skeleton Hands
-
- Use white fondant to mold skeleton hands reaching out from the sides or top of the cake.
Additional Tips:
- Use orange, black, and purple as your primary color palette for a classic Halloween look.
- Edible gold or silver sprays can add a touch of magic to your decorations.
- Consider using Halloween-themed cake toppers or figurines for added effect.
- Black licorice, candy corn, and other Halloween candies can be used as additional decorative elements.
Remember, the key is to let your imagination run wild and have fun with the process. Whether you’re going for a cute, spooky, or downright scary design, your Halloween-themed chocolate cake is sure to be a hit!
Pairing Your Chocolate Cake with Beverages
Pairing your chocolate cake with the right beverage can elevate the dessert experience. Here are some drink suggestions to complement the rich flavors of chocolate cake:
Milk
A classic pairing, a tall glass of milk (whole, low-fat, or non-fat) complements the richness of chocolate cake. For a twist, you can stir in some chocolate syrup to make chocolate milk or even heat the milk and add a drop of vanilla extract for a warm treat.
Coffee
Coffee and chocolate cake are a delightful combination. Whether you prefer your coffee iced or hot, the bitterness of the coffee contrasts beautifully with the sweetness of the cake. For an added touch, consider stirring in liqueurs like Baileys, Kahlua, or Frangelico (hazelnut flavor). Espresso, especially when paired with licorice-flavored liqueurs like Sambuca or Anisette, also goes wonderfully with chocolate cake.
Dessert Wine
Sweet wines can be a perfect match for chocolate cake. It’s recommended to serve a dessert wine that’s slightly sweeter than your cake to balance the acidity. Some good choices include Madeira, Port, Muscat, Riesling, Sauternes, and Ice Wine. Raspberry or strawberry wines can also be paired with chocolate cake, especially if you add a few berries to the dessert.
Stout
This dark, sweet brew, sometimes available in a chocolate flavor, pairs well with chocolate cake. The chocolaty flavor in stout comes from the dark roasting of the malts. Brands like Brooklyn Brewery and Oregon’s Rogue Brewery offer chocolate stouts. If you’re in the mood for a regular stout, Guinness or Samuel Adams Honey Porter are excellent choices. For a unique experience, try adding a scoop of vanilla ice cream to the stout, creating a grown-up float to enjoy with your chocolate cake.
When pairing your chocolate cake with a beverage, consider the specific type and flavor profile of the cake. For instance, a dark chocolate cake might pair best with a robust coffee or stout, while a milk chocolate cake might be best complemented by a sweet wine or milk. Experiment with different combinations to find your perfect match!
Storing and Serving Suggestions
Proper storage and serving can make a significant difference in the taste, texture, and overall appeal of your food. Here are some general guidelines for storing and serving:
Storing
- Temperature Control:
- Cold Foods: Keep them at or below 40°F (4°C). Use a refrigerator for short-term storage and a freezer for long-term storage.
- Hot Foods: Keep them at or above 140°F (60°C). If you’re not serving them immediately, cool them rapidly and refrigerate.
- Airtight Containers:
- Use airtight containers to prevent moisture loss, contamination, and to retain freshness. This is especially important for baked goods, leftovers, and perishable items.
- Labeling:
- Always label your stored food with the date of storage. This helps in tracking freshness and ensures that you consume older items first.
- Dry Storage:
- Items like grains, pasta, and canned goods should be stored in a cool, dry place, away from direct sunlight.
- Separation:
- Store raw meats, poultry, and seafood separately from ready-to-eat foods to prevent cross-contamination.
- Fruits and Vegetables:
- Store them in the crisper drawer of your refrigerator. Some fruits and vegetables release ethylene gas, which can ripen other produce quickly. It’s a good idea to store ethylene-producing items (like apples and bananas) separately from ethylene-sensitive ones (like lettuce).
Serving
- Presentation:
- The visual appeal of food enhances the dining experience. Use clean plates, garnish appropriately, and consider the color contrast of the food.
- Serving Temperature:
- Serve hot foods hot and cold foods cold. Reheat leftovers to at least 165°F (74°C) and ensure that cold dishes are served chilled.
- Portion Control:
- Serve appropriate portions to prevent wastage. It’s always better to offer seconds than to overload a plate.
- Hygiene:
- Always use clean utensils and serving dishes. Avoid touching food with bare hands.
- Accompaniments:
- Serve dishes with their appropriate sides, sauces, or dips. For example, a slice of cake might be accompanied by a scoop of ice cream or a drizzle of sauce.
- Drink Pairings:
- Consider the beverage that complements your meal. Whether it’s wine with dinner, coffee with dessert, or a refreshing drink with a summer salad, the right beverage can elevate the meal.
- Allergen Awareness:
- If serving guests, be aware of any food allergies or dietary restrictions. Label foods that might contain common allergens.
- Serving Utensils:
- Provide the right utensils for each dish, whether it’s tongs for salad, a spatula for cake, or a ladle for soup.
Remember, the key to successful storing and serving is a combination of safety, aesthetics, and practicality. Proper storage ensures the longevity and safety of your food, while thoughtful serving enhances the dining experience.
Triple Chocolate Cake Pumpkin-Styled
Ingredients:
- 1 HERSHEY’S Milk Chocolate Bar (6 oz), broken into pieces
- 1/2 cup butter or margarine (1 stick), softened
- 1 cup boiling water
- 2 cups all-purpose flour
- 1 – 1/2 cups sugar
- 1/2 cup HERSHEY’S Cocoa
- 1 tsp vanilla extract
- 2 tsps baking soda
- 1 tsp salt
- 2 eggs
- 1/2 cup dairy sour cream
- Chocolate Coated Ice Cream Cone
- 1 cup HERSHEY’S SPECIAL DARK Mildly Sweet Chocolate Chips or HERSHEY’S Semi-Sweet Chocolate Chips
- 1 Tbsp shortening (do NOT use butter, margarine, spread or oil)
- Orange Frosting Ingredients:
- 1/3 cup butter or margarine
- 2 cups powdered sugar
- 2 tsps freshly grated orange peel
- 1 – 1/2 tsps vanilla extract
- 2 to 4 Tbsps hot water
- Few drops yellow and red food color
- Decorator’s Frosting Ingredients:
- 3 Tbsps water
- 1 Tbsp meringue powder
- 1 – 1/2 cups sugar
- 1/8 tsp vanilla extract
Directions:
- Heat oven to 350°F. Grease and flour 12-cup fluted tube pan.
- Stir together chocolate bar pieces, butter, and water in a medium bowl until chocolate is melted.
- In a large bowl, combine flour, sugar, cocoa, baking soda, and salt. Gradually add the butter mixture, blending well. Incorporate eggs, sour cream, and vanilla, beating on medium speed for 1 minute. Pour the batter into the prepared pan.
- Bake for 50 to 55 minutes or until a wooden pick inserted in the center comes out clean. Let it cool for 10 minutes before transferring to a wire rack. Cool completely.
- Prepare the Chocolate Coated Ice Cream Cone and Orange Frosting as described in the ingredients. Place the ice cream cone in the center of the cake to resemble a pumpkin stem. Use a leaf decorating tip to pipe leaves onto the ‘pumpkin’ with Decorator’s Frosting.
Prep Time: 1 hour 30 minutes | Cooking Time: 50 minutes | Total Time: 2 hours 20 minutes
Kcal: 610 kcal | Servings: 12 servings
FAQs
1. What is a secret ingredient for cakes?
-
- There are several ingredients that can elevate the taste and texture of a cake. Some of these include:
- Whole Milk: Replacing water in the recipe with milk can give the cake a denser texture.
- Sour Cream: Adding a couple of dollops can make the cake extra moist.
- Pudding: Incorporating instant pudding powder can enhance the flavor.
- Mayonnaise: Replacing the oil with mayo can make the cake moist and rich.
- Coffee: Substituting brewed coffee for water in a chocolate cake can intensify the chocolate flavor.
- Lemon: Adding lemon juice and zest can give a tart kick to a yellow cake.
- Butter: Using melted butter instead of vegetable oil can give the cake a richer taste.
- There are several ingredients that can elevate the taste and texture of a cake. Some of these include:
2. What makes a cake made from scratch moist?
-
- Use Real Butter: Butter, as opposed to margarine, adds moisture due to its fat content.
- Measure Flour Correctly: Over-measuring flour can make the cake dry. It’s best to fluff the flour, spoon it into the measuring cup, and level it off without shaking.
- Add Fat: Cakes with only egg whites might need additional fat for moisture. Adding sour cream can help.
- Bake Time and Temp: Overbaking can dry out a cake. It’s essential to monitor the baking time and adjust the oven temperature if necessary.
- Use Light Colored Cake Pans: Dark pans can cause the cake to have dry edges.
- Mix on Low Speed: Over-mixing can result in a dry and dense cake.
- Serve at Room Temperature: Cakes are often moister at room temperature than when cold.
3. How to make a Gordon Ramsay chocolate cake?
-
- Gordon Ramsay has a unique chocolate cake recipe that combines chocolate with ginger, giving it a sweet and slightly spicy flavor. You can find the detailed recipe in his cooking videos or his cookbooks.
4. How to decorate a plain chocolate cake?
-
- There are numerous ways to decorate a chocolate cake:
- Dusting: Use powdered sugar or cocoa powder for a simple and elegant look.
- Chocolate Ganache: Pouring a shiny ganache over the cake gives a glossy finish.
- Fruits: Fresh berries, sliced fruits, or candied citrus peels can add color and flavor.
- Nuts: Chopped or whole nuts like almonds, hazelnuts, or pecans can add crunch.
- Whipped Cream or Buttercream: Piping designs or simply spreading it can enhance the cake’s appearance and taste.
- There are numerous ways to decorate a chocolate cake:
5. Does oil or butter make a cake more moist?
-
- Both oil and butter can make a cake moist, but they offer different textures and flavors. Oil tends to make cakes moister than butter because it remains liquid at room temperature. Butter provides a richer flavor but might not give as moist a texture as oil. The choice between them often depends on the specific recipe and personal preference.
2 thoughts on “The Ultimate Guide to a Chocolate Cake Recipe from Scratch for an Easy Halloween Celebration”